Enrolling your first Mac
Enrolment is how a Mac introduces itself to ownMDM. You generate a link, run the installer it produces on the Mac, and the device begins checking in on its own. From then on it appears in your fleet, receives software, and reports its status back.
The whole process takes about five minutes, and most of that is waiting for the download.
Before you begin
You will need:
- An ownMDM account with permission to manage devices
- A Mac running macOS 12 or later
- Administrator access on that Mac (the installer asks for a password)
You do not need to install anything on the Mac first, and you do not need the device in front of you — an enrolment link can be sent to whoever is using it.
Step 1 — Open the Devices page
Sign in and select Devices from the sidebar. This is the view you will return to most often: every enrolled Mac, its current status, and when it last reported in.
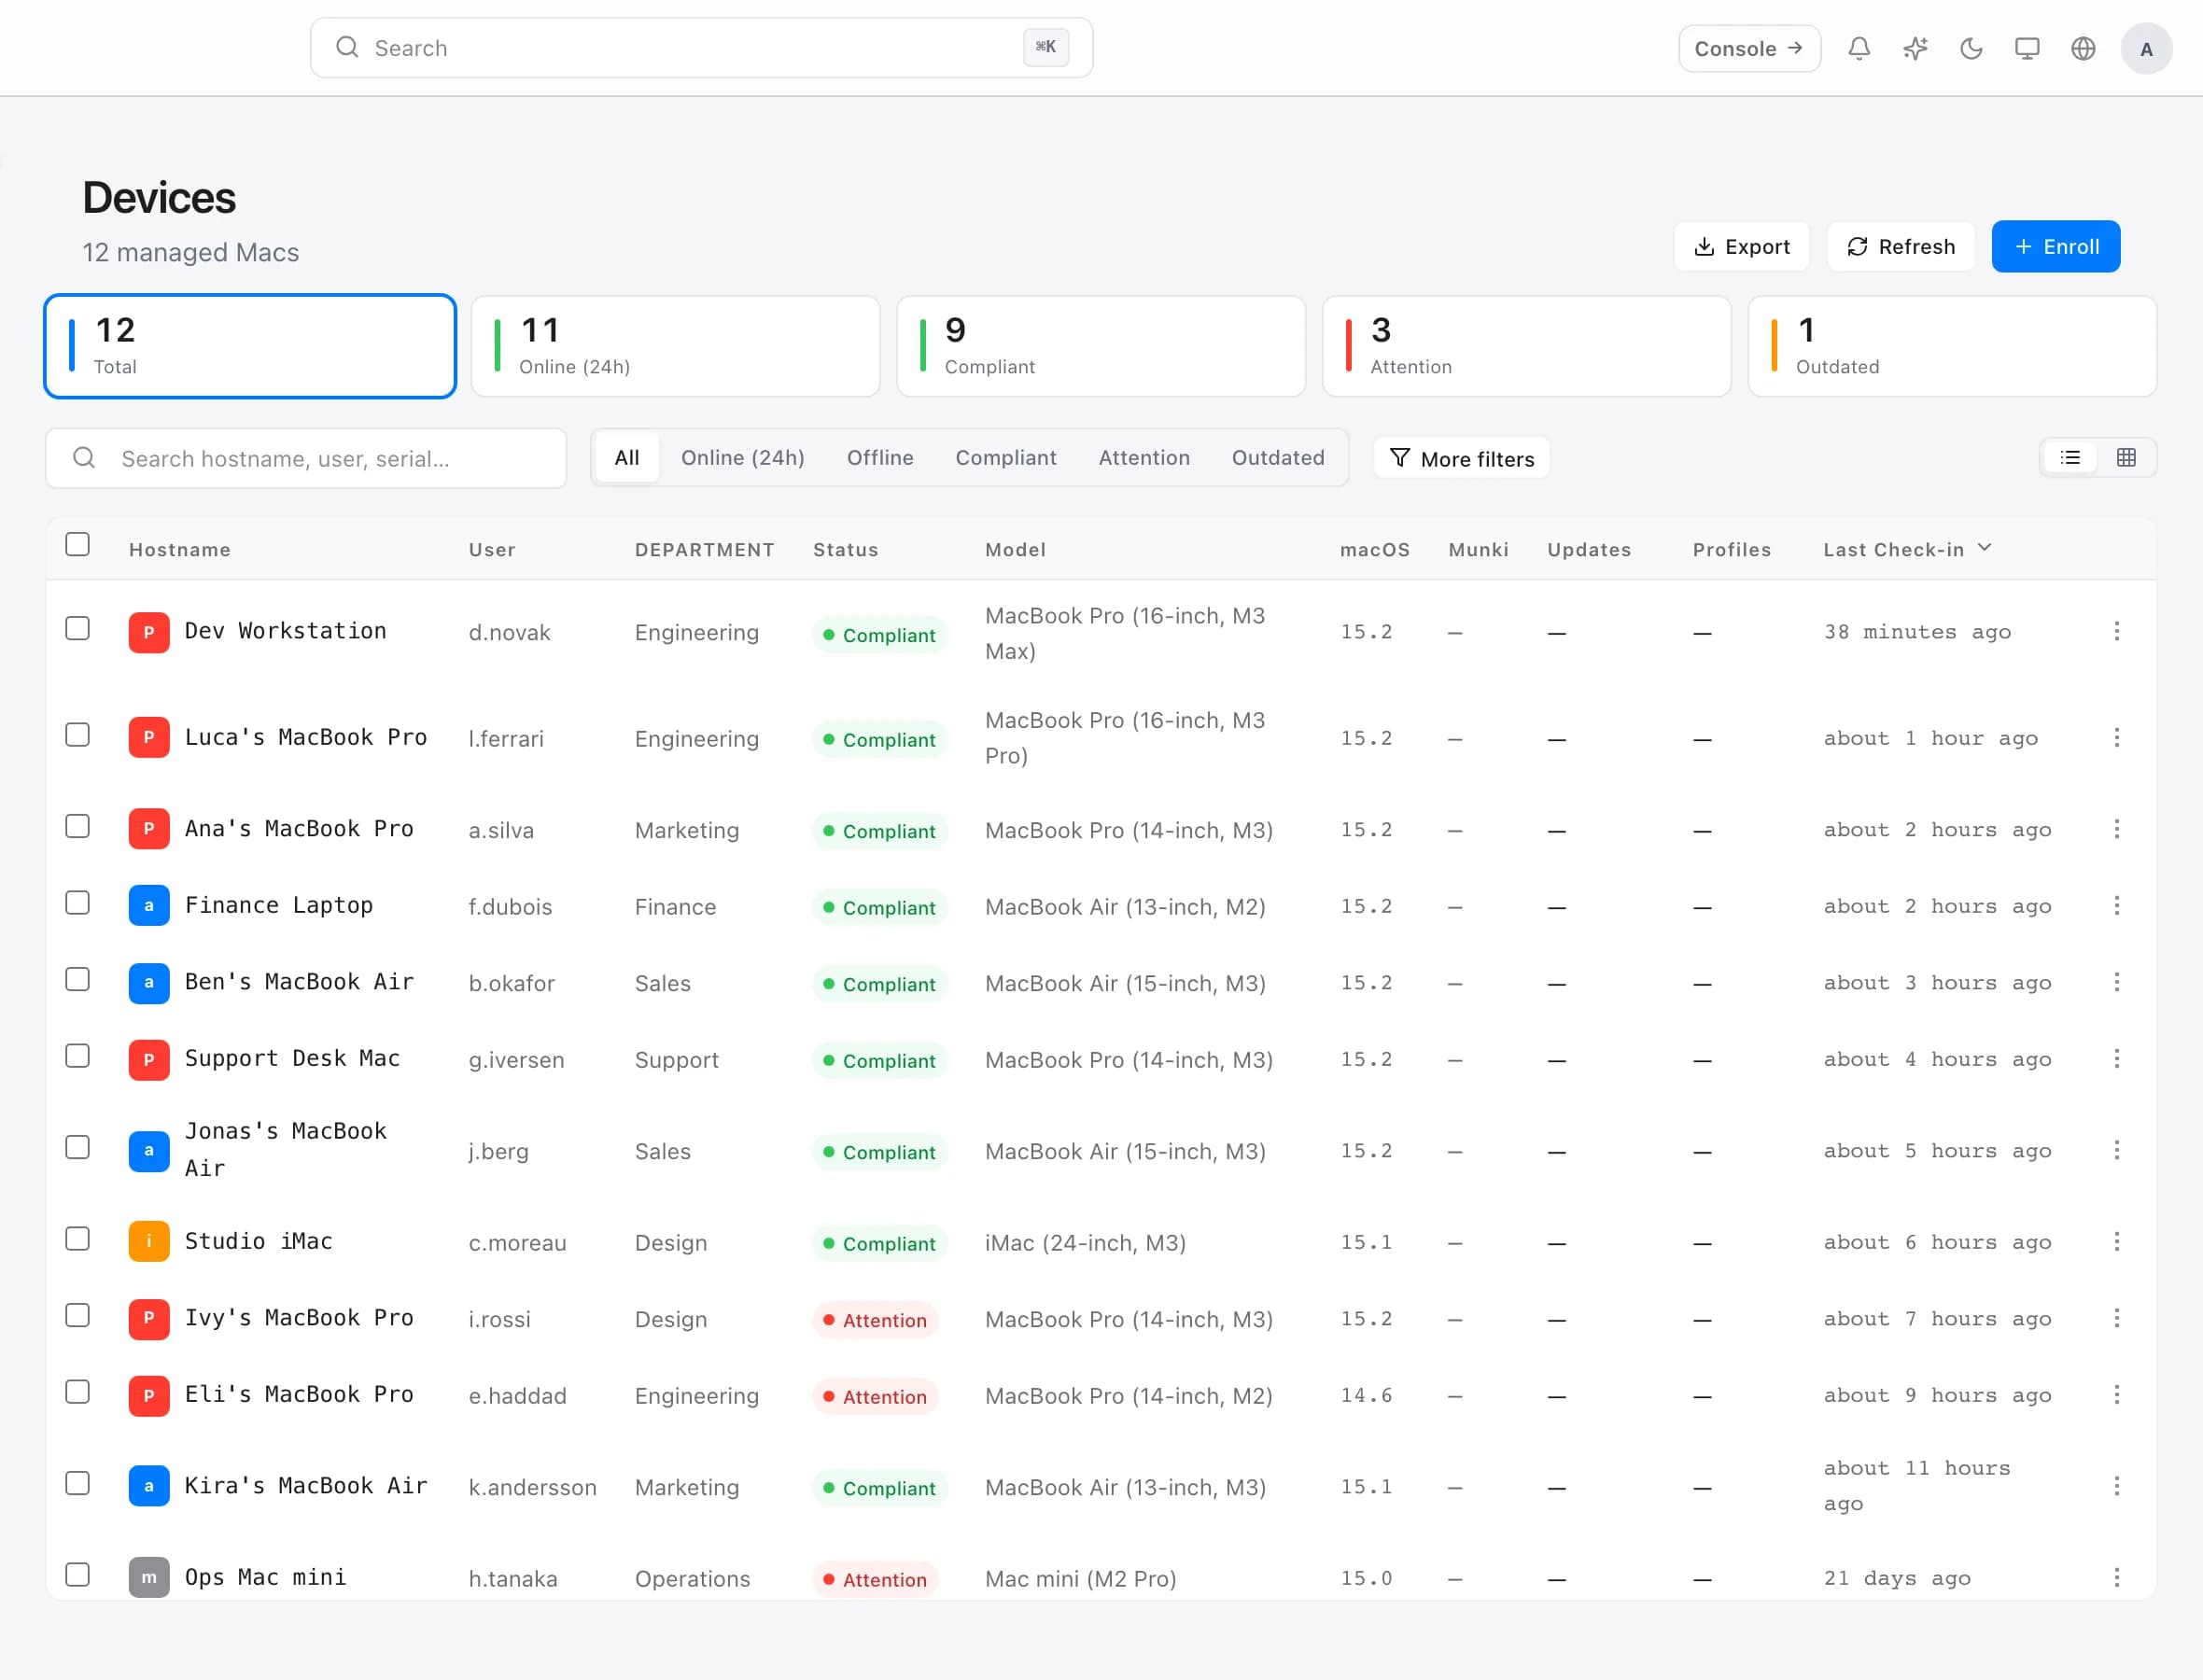
If this is a brand-new account, the list is empty. That is expected — you are about to change it.
Step 2 — Create an enrolment link
Select Enrol device. ownMDM generates a link that carries everything the installer needs: which organisation the Mac belongs to and how it should authenticate on its first check-in.
A few things worth knowing about these links:
- They can expire. Set a shorter window for a link you are emailing to someone.
- They can be limited to one device. Useful when sending a link to a single person.
- They can be revoked. If a link goes somewhere it should not have, revoke it and generate another. Macs already enrolled through it are unaffected.
Step 3 — Run the installer on the Mac
Open the link on the Mac being enrolled. It downloads a signed installer package.
- Open the downloaded package and follow the prompts.
- Enter an administrator password when macOS asks for one.
- Wait for the installer to finish — it takes under a minute.
The package is signed and notarised by Apple, so macOS installs it without security warnings. If you see a warning that the package is from an unidentified developer, the download was incomplete; download it again from the same link.
That package is built the moment you ask for it, in four stages:
- BakeYour enrollment token is written into the package, so it enrols this tenant and no other
- SignSigned with a Developer ID certificate and a hardened runtime
- NotarizeSubmitted to Apple, which scans it and issues a ticket
- StapleThe ticket is attached to the package, so it installs even offline
Stapling is what removes the security warning: the ticket travels inside the file, so macOS can verify it without asking Apple at install time.
Step 4 — Confirm the device checked in
Back in ownMDM, return to Devices. Within a minute or two the newly enrolled Mac appears in the list with its serial number, hostname, and macOS version already filled in.
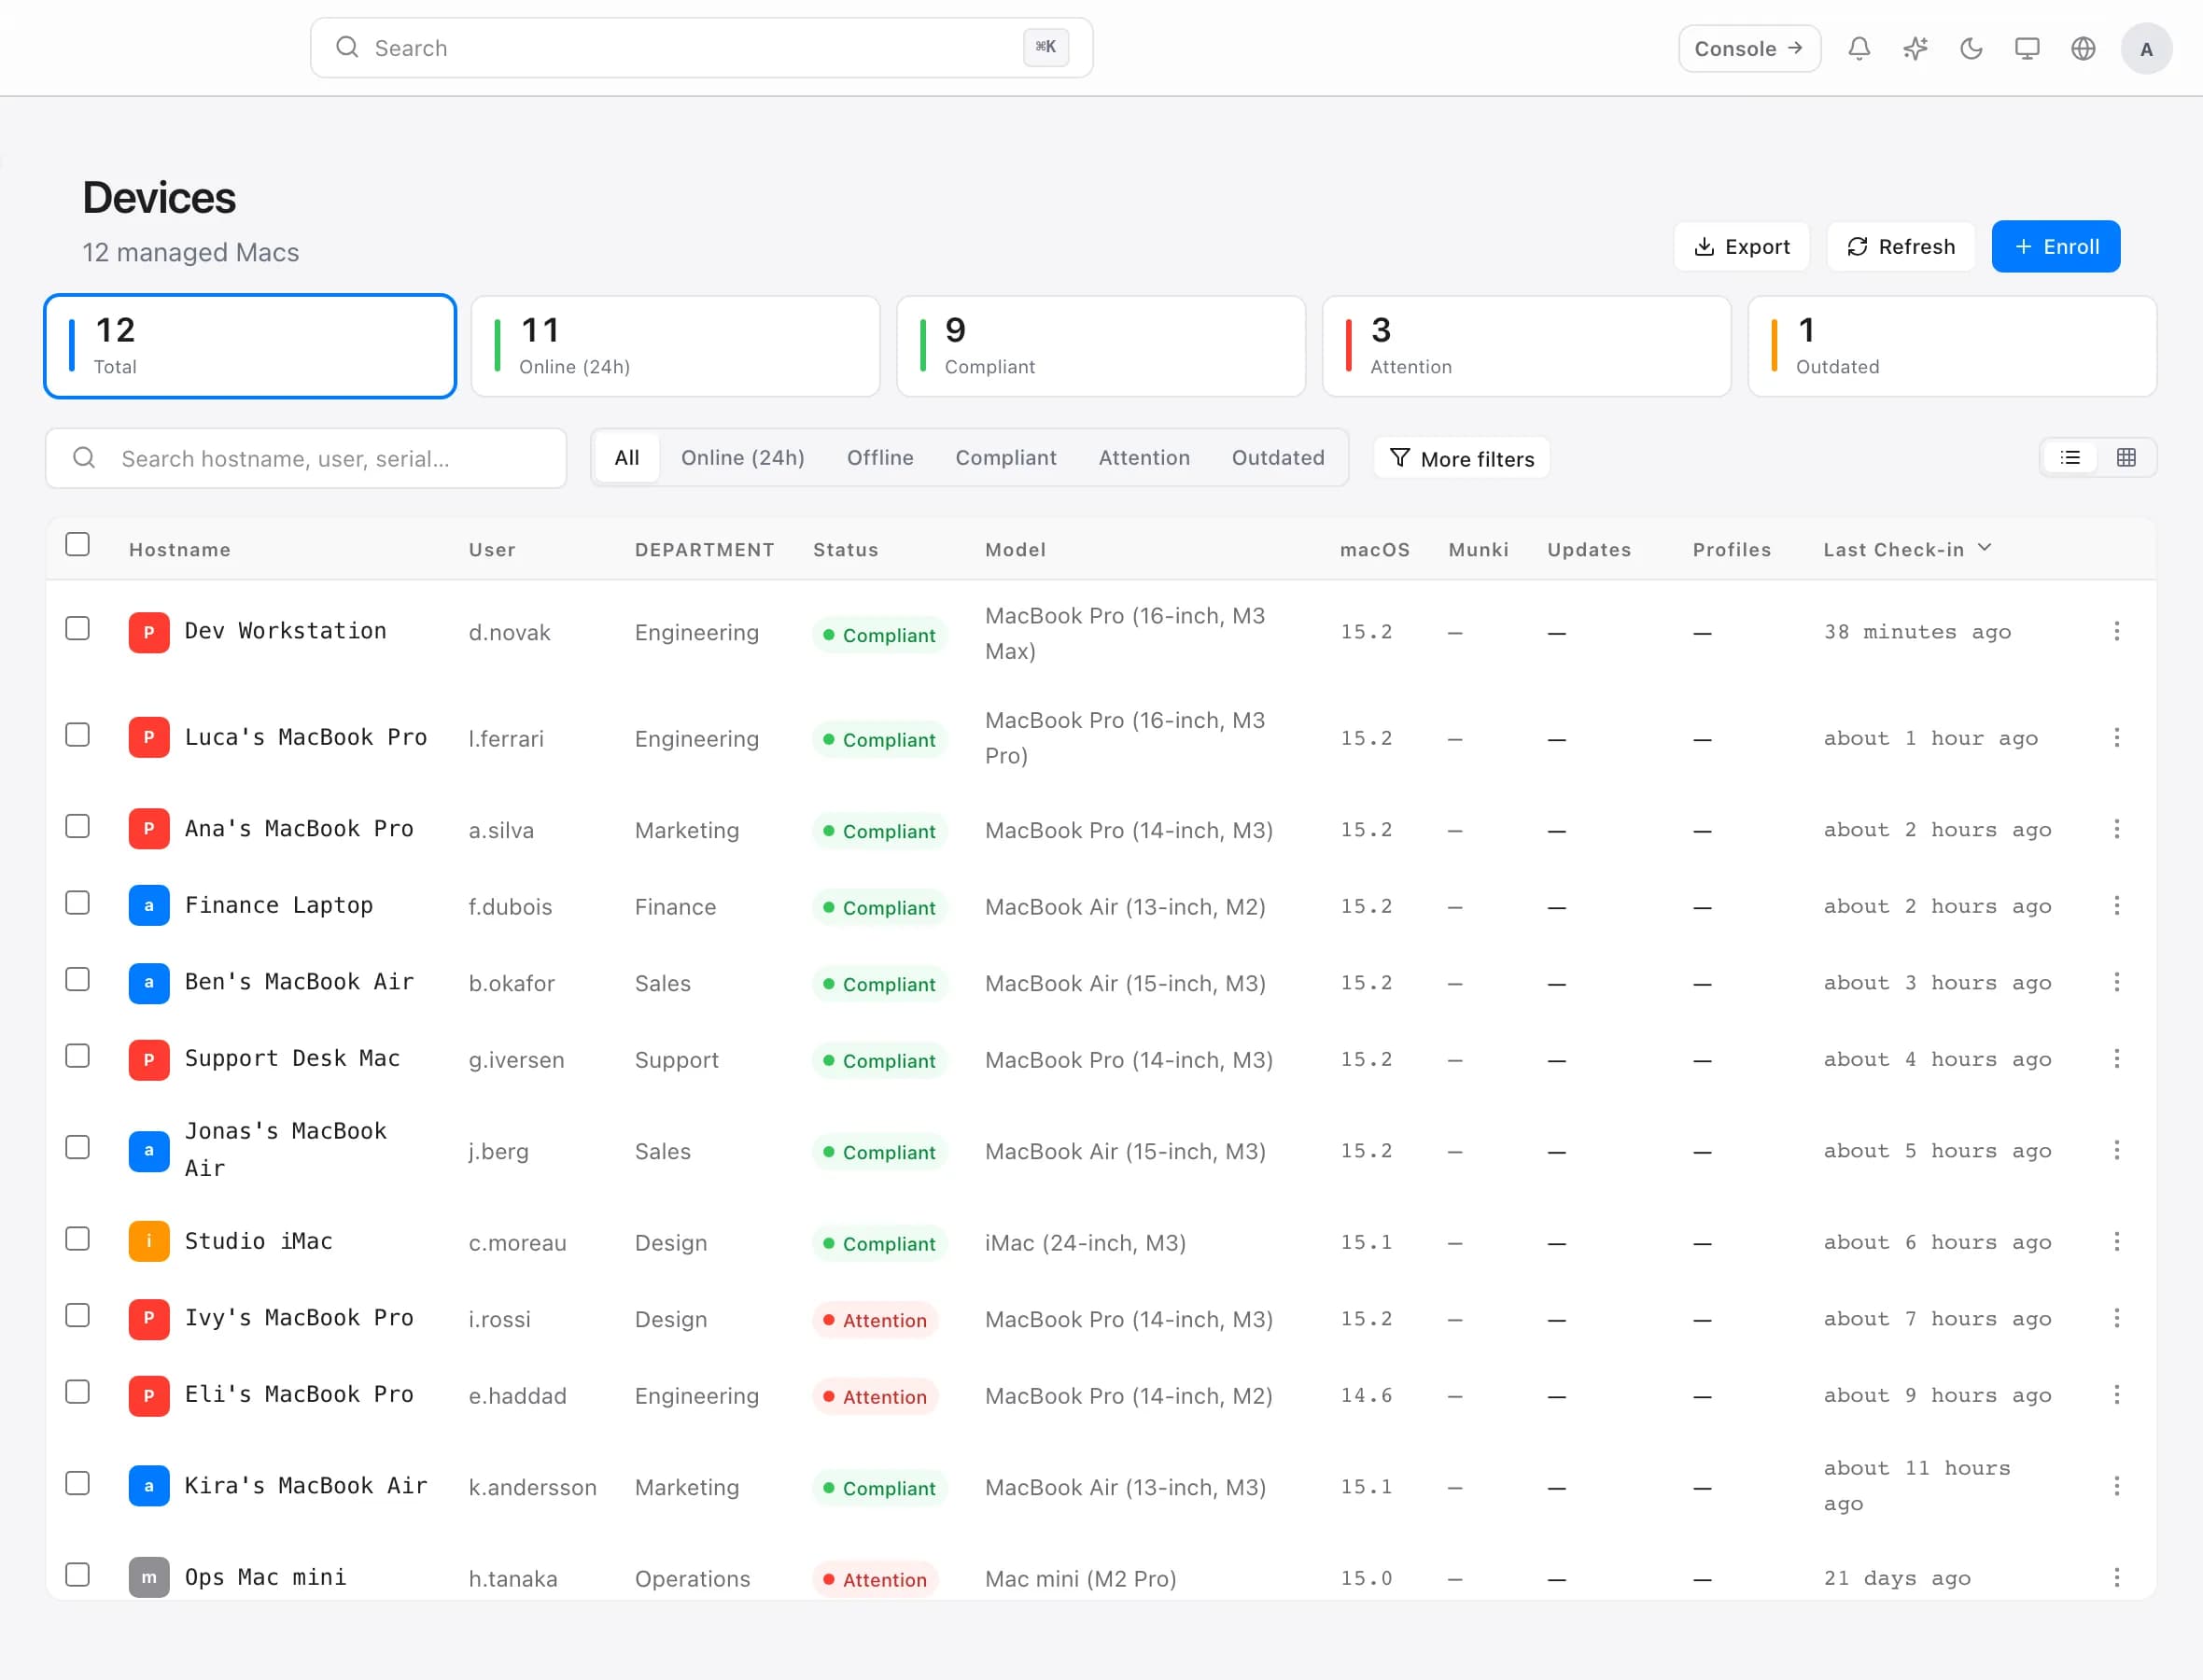
Select the device to see its full record: hardware, storage, security posture such as FileVault and firewall status, and a timeline of everything that has happened to it.
If the Mac has not appeared after five minutes, see Troubleshooting below.
What happens next
Enrolment is not a one-off event — it is the start of an ongoing conversation between the Mac and ownMDM. From here the device will:
- Check in regularly, refreshing its hardware inventory and status
- Receive software you assign to it, installing in the background
- Report compliance, so you can see at a glance whether it meets your standards
Nothing further is required on the Mac. The person using it does not need to do anything to keep it enrolled.
Two guides pick up from here:
Deploying software to your fleet
Upload an app, test it on a few Macs, then roll it out to everyone — without touching a single machine by hand.
Read guideUnderstanding compliance status
What makes a Mac compliant, how to read the compliance view, and what to do about the machines that are not.
Read guideTroubleshooting
The Mac has not appeared after several minutes. Confirm the installer finished successfully — a cancelled install leaves nothing behind. Re-running it is safe.
The enrolment link shows an error. The link may have expired, been revoked, or already reached its device limit. Generate a fresh one.
The device appears but shows no hardware details. It registered but has not completed its first full check-in. Give it a few more minutes; details fill in automatically.
The Mac was previously enrolled somewhere else. A Mac can only belong to one organisation at a time. Remove it from the previous one before enrolling it again.